Introduction
Most security assessments focus on the obvious elements – access control systems, video surveillance, perimeter fencing, and intrusion detection. These are critical components and rightfully receive significant attention. However, working with security assessments across airports, corporate campuses, manufacturing facilities, and distribution centers for over 25 years, these five areas consistently fall through the cracks.
These aren’t typically intentional oversights. Rather, they’re elements that fall between departmental responsibilities, get deprioritized during budget constraints, or simply become invisible through familiarity. The problem is that security vulnerabilities don’t care whether they were overlooked intentionally or accidentally – they create risk either way.
Let’s examine each of these often-overlooked elements, understand why they matter, and explore practical solutions.
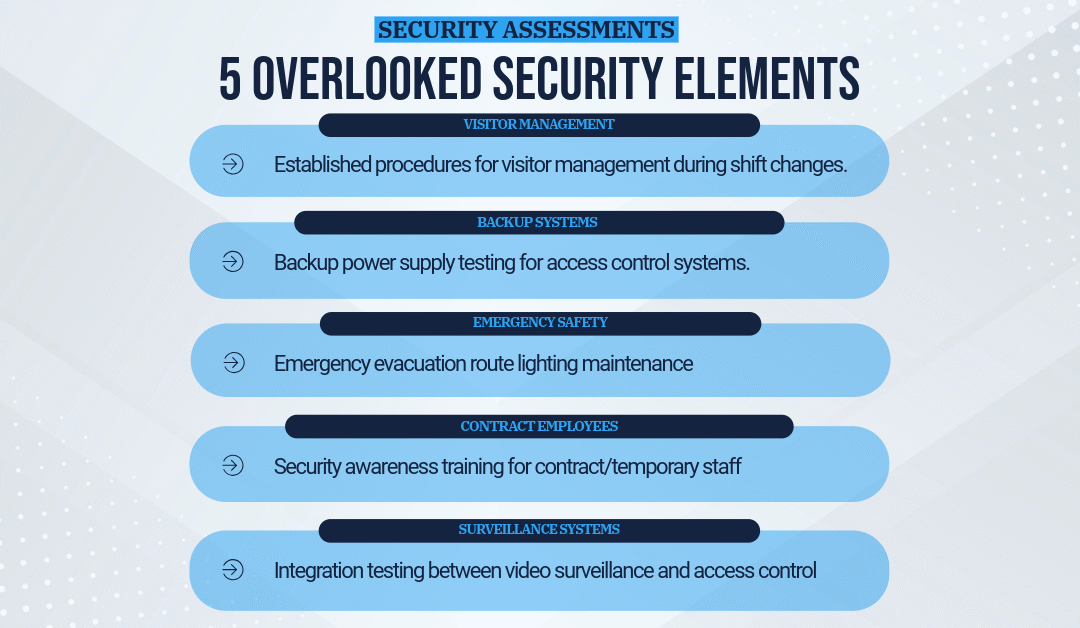
5 Often-Overlooked Elements in Physical Security Assessments (And How to Address Them)
Introduction
Most security assessments focus on the obvious elements – access control systems, video surveillance, perimeter fencing, and intrusion detection. These are critical components and rightfully receive significant attention. However, working with security assessments across airports, corporate campuses, manufacturing facilities, and distribution centers for over 25 years, these five areas consistently fall through the cracks.
These aren’t typically intentional oversights. Rather, they’re elements that fall between departmental responsibilities, get deprioritized during budget constraints, or simply become invisible through familiarity. The problem is that security vulnerabilities don’t care whether they were overlooked intentionally or accidentally – they create risk either way.
Let’s examine each of these often-overlooked elements, understand why they matter, and explore practical solutions.
1. Visitor Management Protocols During Shift Changes
Why This Matters
Shift changes create predictable windows of vulnerability in security operations. During the 15-30 minutes when one security team is leaving and another is arriving, attention is divided. Officers are conducting handoffs, reviewing logs, discussing incidents from the previous shift, and getting oriented.
This is precisely when sophisticated intruders strike. They know that during shift changes:
- Attention is focused internally on handoff procedures
- Officers may assume the other shift is monitoring a situation
- Visitor management may receive reduced attention
- Communication gaps can occur between departing and arriving staff
What Typically Goes Wrong
The Scenario: A corporate campus requires all visitors to check in at the main lobby, receive a badge, and be escorted to their destination. The policy is clear and generally well-followed. However, during shift changes at 7:00 AM, 3:00 PM, and 11:00 PM, enforcement becomes inconsistent.
Common Problems:
- Visitors arrive during shift change and bypass check-in while officers are distracted
- Temporary badges issued near the end of one shift aren’t properly logged by the incoming shift
- Escort requirements are relaxed during transition periods
- No clear ownership of visitor management during the transition window
- Returning visitors exploit the chaos to skip procedures they view as inconvenient
Real-World Impact
At one facility, security footage revealed that over a two-week period, an average of 3-4 individuals per day entered the building during shift changes without proper visitor screening. Most were likely legitimate visitors who simply took advantage of reduced oversight. But it only takes one person with malicious intent to create a serious incident.
In another case, a fired employee returned to a facility during an evening shift change, gained access by following authorized personnel, and accessed areas of the building where he retrieved proprietary information. The incident went undetected for days because neither the departing nor the arriving shift claimed responsibility for the breach.
How to Address It
Establish Overlap Procedures: Create a specific protocol for shift changes that ensures continuous visitor management coverage. Designate one officer to remain dedicated to visitor processing during the handoff period while others conduct shift change procedures.
Stagger Shift Changes: If staffing allows, stagger shift changes by 15-30 minutes to prevent all officers from transitioning simultaneously. This maintains operational awareness throughout the facility.
Technology Solutions: Implement automated visitor management systems that don’t rely solely on officer attention. Systems that require:
- Self-service kiosks for visitor check-in
- Automated badge printing with photo capture
- Real-time alerts to facility managers when visitors enter
- Integration with access control to restrict visitor badge access to specific areas
Document and Train: Make shift change visitor management a specific topic in training. Include it in:
- New officer orientation
- Quarterly refresher training
- Standard operating procedures with clear assignment of responsibilities
- Shift handoff checklists
Implementation Checklist:
[ ] Review visitor logs during shift change times for patterns
[ ] Observe shift changes to identify coverage gaps
[ ] Assign dedicated visitor management coverage during transitions
[ ] Update SOPs to address shift change procedures specifically
[ ] Train all security personnel on new protocols
[ ] Conduct quarterly audits of shift change visitor management
[ ] Review security footage periodically to verify compliance
2. Backup Power Supply Testing for Access Control Systems
Why This Matters
Your access control system is only as reliable as its power supply. When primary power fails—whether due to storms, equipment failure, utility work, or any other reason—your access control system must continue to function. Otherwise, you face an impossible choice:
Option A: Fail secure (doors lock) – trapping people inside and potentially violating life safety codes
Option B: Fail open (doors unlock) – creating massive security vulnerabilities
Neither option is acceptable. Backup power ensures that your access control system continues to function during outages, maintaining both security and life safety.
What Typically Goes Wrong
The Assumption Trap: Most facilities have some form of backup power – uninterruptible power supplies (UPS), battery backups, or emergency generators. The problem isn’t the absence of backup power; it’s the assumption that it will work when needed without regular testing.
Common Problems:
- Backup batteries that have exceeded their service life and no longer hold a charge
- UPS systems that haven’t been load-tested to verify they can support actual operating requirements
- Emergency generators that start but can’t sustain the required load
- Access control panels connected to circuits not served by backup power
- Network infrastructure (switches, routers) supporting cloud-based access control not on backup power
- Transfer switches that fail during the actual emergency
- Remote doors or card readers beyond the range of backup power coverage
Real-World Impact
During a security assessment of a distribution facility, testing of their backup power was conducted by simulating a power outage to their access control system. The UPS units immediately kicked in as expected. However, within 8 minutes, the system began experiencing failures. Investigation revealed that while the access control panels had battery backup, the network switches powering the IP-based card readers did not. The result: 60% of access points failed within 10 minutes of primary power loss.
The facility had been operating under the assumption that they had “full backup power coverage” for years. A real emergency would have created both security and life safety issues.
In another case, a corporate campus discovered during an actual power outage that their 5-year-old UPS batteries provided less than 30 minutes of runtime instead of the designed 4 hours. The batteries had gradually degraded and were never tested under load.
How to Address It
Conduct Regular Load Testing: Testing backup power isn’t just about seeing if the UPS powers on. It requires simulating actual operating conditions to verify runtime and capacity.
Monthly:
- Visual inspection of UPS/battery backup systems
- Check status indicators and logs
- Verify batteries are charging properly
- Document any error messages or warnings
Quarterly:
- Conduct a controlled power-off test during low-activity periods
- Simulate a power failure and verify that access control continues functioning
- Time actual runtime under load
- Test door operations on backup power
- Verify all access points remain functional
- Test integration with other systems (video surveillance, intrusion detection)
Annually:
- Professional testing of all backup power systems
- Load bank testing of emergency generators
- Battery capacity testing
- Replacement of batteries approaching the end of service life
- Update documentation of backup power coverage
Document Everything: Create comprehensive documentation showing:
- Which access control components are on backup power
- Expected runtime for each component
- Testing schedule and results
- Battery replacement dates and service life
- Contact information for emergency service providers
Infrastructure Considerations:
For Traditional Wired Systems:
- Verify each access control panel has a functional battery backup
- Ensure power supplies are sized appropriately for connected devices
- Document the expected runtime for each panel
For IP-Based/Cloud Systems:
- Ensure network infrastructure (switches, routers, WiFi access points) has backup power
- Verify internet connectivity remains available during power outages
- Consider cellular backup for cloud-based systems
- Test reader functionality when the network is on backup power
For Wireless/Battery-Powered Readers:
- Monitor battery levels on wireless readers
- Establish replacement schedules based on actual usage
- Keep spare batteries on hand
- Test wireless signal strength during backup power operation
Implementation Checklist:
[ ] Inventory all access control components and their power sources
[ ] Identify which components have backup power and which don’t
[ ] Calculate expected runtime for each backup power source
[ ] Establish monthly, quarterly, and annual testing schedules
[ ] Create testing procedures that don’t disrupt operations
[ ] Document all testing with dates, results, and any issues found
[ ] Budget for battery replacement on recommended service intervals
[ ] Train staff on testing procedures and documentation requirements
[ ] Consider monitoring systems that alert when backup power is in use
3. Emergency Evacuation Route Lighting Maintenance
Why This Matters
Emergency evacuation route lighting may seem straightforward – simply install exit signs and emergency lights, and you’re done. However, effective emergency lighting requires much more than just the initial installation. It needs to be visible, functional, and bright enough to navigate by during actual emergency conditions.
During an emergency, especially one involving fire or smoke, standard lighting may fail. People under stress need clear, well-lit paths to safety. Emergency lighting that’s burned out, too dim, or improperly positioned can turn a manageable evacuation into a tragedy.
What Typically Goes Wrong
Out of Sight, Out of Mind: Emergency lights typically only activate during power failures. Because they’re not in use daily, their functionality often goes unnoticed until they’re needed.
Common Problems:
- Burned-out bulbs in exit signs or emergency lights that no one notices
- The battery backup in the emergency lights has degraded and won’t sustain illumination
- Emergency lights that have been painted over during facility updates
- Furniture, equipment, or storage items blocking exit signs or emergency lights
- Improper positioning that creates dark areas in evacuation routes
- Emergency lights that work but provide insufficient illumination
- Exit signs pointing in confusing or outdated directions after facility changes
- Testing buttons on emergency lights that haven’t been pressed in years
- No documentation of which fixtures are emergency lighting vs. standard lighting
Real-World Impact
During a security assessment at a manufacturing facility, an emergency lighting evaluation was conducted during daylight hours. Of the 47 emergency lighting fixtures in the building:
- 12 had burned-out bulbs
- 8 had battery backups that wouldn’t sustain illumination for more than a few minutes
- 5 were completely obscured by stored materials or equipment
- 3 exit signs pointed toward doors that had been permanently locked after a facility reconfiguration
The facility held monthly fire drills, but they were always conducted during daylight hours with standard lighting in effect. No one had noticed the emergency lighting deficiencies because they’d never relied on it.
When they simulated a nighttime power failure during low-activity hours, significant portions of the evacuation routes were too dark to navigate safely. Multiple stairwells had inadequate lighting, and several exit routes lacked functional emergency lighting altogether.
How to Address It
Establish Regular Testing Protocols:
Monthly Visual Inspections: Walk all evacuation routes during normal operations:
- Verify all exit signs are illuminated and visible
- Check for obstructions blocking exit signs or emergency lights
- Look for burned-out bulbs or damaged fixtures
- Confirm that exit signs point toward actual usable exits
Monthly Function Testing: Test each emergency light’s battery backup:
- Press the test button on each emergency light fixture
- Verify the light comes on at full brightness
- Confirm it remains lit for at least 30 seconds during the test
- Document any failures for immediate replacement
Quarterly Full-Duration Testing: Simulate actual emergency conditions:
- Conduct tests during evening hours when ambient light is reduced
- Turn off standard lighting in sections of the facility
- Verify that emergency lights activate automatically
- Walk evacuation routes using only emergency lighting to verify adequate illumination
- Time how long batteries sustain full brightness
- Note any dark spots or areas needing additional fixtures
Annual Comprehensive Assessment: Professional evaluation of the entire emergency lighting system:
- Load testing of all battery backups
- Illumination level measurements (foot-candles/lux)
- Verification of coverage per applicable codes
- Evaluation of exit sign visibility from all angles
- Review of evacuation route changes requiring lighting updates
Documentation Requirements:
Create and maintain documentation showing:
- Location of all emergency lighting fixtures (map)
- Type and age of each fixture
- Battery replacement dates and service life
- Testing dates and results
- Failed fixtures and repair/replacement dates
- Code requirements and compliance verification
Maintenance Procedures:
Immediate Actions:
- Replace burned-out bulbs within 24 hours
- Replace failed battery backups within 48 hours
- Clear any obstructions immediately
- Add temporary lighting if needed until repairs are completed
Preventive Maintenance:
- Replace batteries on manufacturer-recommended schedule (typically 3-5 years)
- Replace bulbs before they burn out (based on rated life)
- Clean fixtures and lenses annually to maintain brightness
- Update exit signage when facility layouts change
Code Compliance Considerations:
Emergency evacuation lighting requirements vary by:
- Local building codes
- Fire codes (NFPA, IFC)
- Life safety codes
- Occupancy type
- Building size and height
- Occupant load
Ensure your emergency lighting system meets or exceeds all applicable requirements for your facility.
Implementation Checklist:
[ ] Create a map of all emergency lighting fixtures in your facility
[ ] Document the current condition of each fixture
[ ] Establish a monthly visual inspection routine
[ ] Create emergency lighting test button schedule
[ ] Schedule quarterly full-duration tests during evening hours
[ ] Budget for battery and bulb replacement
[ ] Designate responsible personnel for testing and documentation
[ ] Review evacuation routes for adequacy of emergency lighting
[ ] Identify and address any dark spots or coverage gaps
[ ] Verify exit signs accurately reflect current evacuation routes
[ ] Establish a relationship with the lighting contractor for emergency service
[ ] Consider photoluminescent exit path marking as a supplement
4. Security Awareness Training for Contract/Temporary Staff
Why This Matters
Your security protocols are only as strong as the people who follow them. While organizations typically provide security awareness training to full-time employees, contract workers, temporary staff, and vendors often receive minimal or no security training.
This creates significant vulnerabilities because:
- Temporary staff may not understand security policies and procedures
- They have less loyalty or connection to the organization
- Background screening may be less thorough
- They’re often working in sensitive areas (maintenance, IT, cleaning crews)
- They may view security measures as obstacles to completing their work quickly
- They’re less likely to report suspicious activity
What Typically Goes Wrong
The Training Gap: Organizations invest in comprehensive security awareness programs for employees, but often overlook the temporary workforce, which may represent 20-30% of the people in their facilities at any given time.
Common Problems:
- Contract staff are not included in security awareness training programs
- Temporary employees receive a badge and nothing else
- Vendors are given access without understanding the tailgating policies
- Cleaning crews working after hours with minimal supervision or training
- Maintenance contractors unfamiliar with restricted area protocols
- No clear owner of security training responsibility for non-employees
- Language barriers are preventing effective security communication
- High turnover makes training seem impractical
- No verification that contractors understand security requirements
- Assumption that the contracting company provides adequate security training
Real-World Impact
A corporate research facility reviewed security incident reports and found a disturbing pattern. Over a six-month period:
- 8 incidents of doors being propped open occurred after hours – all by cleaning staff
- 3 instances of unauthorized individuals following employees into secure areas – two involved visitors with contractors
- Multiple reports of badges left unattended in common areas – primarily temporary staff
- One incident of sensitive documents found in trash bins in common areas – the cleaning crew was unaware of document destruction policies.
When interviewing contract supervisors, none could confirm that their staff had received any security training from either the facility or their employer. The cleaning crew supervisor stated, “We just tell them to clean the offices and don’t touch papers on desks.”
In another case, a temporary IT contractor working on a weekend project allowed a person claiming to be from his company to follow him into a secure data center. The individual was actually a social engineer conducting a penetration test for the company’s security team. The contractor had never been briefed on escort requirements or how to verify the identity of visitors.
How to Address It
Develop Contract/Temporary Staff Security Orientation:
Create a focused security awareness program designed explicitly for non-employees:
Core Components:
- Badge Requirements and Display
- How to properly wear and display badges
- Consequences of loaning badges or allowing others to use them
- Lost badge reporting procedures
- Badge return requirements
- Access Control Policies
- Using badge readers properly (one person per badge swipe)
- Never propping doors open
- Never allowing others to follow without badging
- Restricted area identification and policies
- Visitor Escort Requirements
- When escorts are required
- How to verify the identity of visitors
- What to do if someone claims to be authorized but has no escort
- Information Security Basics
- Not accessing or handling documents/information unrelated to their work
- Proper disposal of any materials (not standard trash)
- Prohibition on photographing or recording in the facility
- Computer and network use restrictions
- Reporting Procedures
- How to report suspicious activity
- Who to contact with security questions
- No retaliation for good-faith reports
- Work Area Specifics
- Any special requirements for areas where they’ll work
- Time restrictions on their access
- Check-in/check-out procedures if applicable
Delivery Methods:
For Long-Term Contractors:
- In-person orientation session (30-45 minutes)
- Brief quiz to verify understanding
- Signed acknowledgment of security responsibilities
- Annual refresher training
For Short-Term/Temporary Staff:
- Brief video training (10-15 minutes) available in multiple languages
- Key points summary card they receive with their badge
- Signed acknowledgment form
- Escort required in sensitive areas
For Regular Vendors:
- Annual security briefing for repeat vendors
- Documented acknowledgment kept on file
- Updates provided when policies change
- Vendor screening requirements (see Vendor Management section below)
Implementation Strategies:
Contractual Requirements: Include security training requirements in all contracts:
- Specify that the contractor must provide evidence of security awareness training OR
- Require contractor employees to complete your facility orientation before starting work
- Make security compliance a contractual obligation with consequences for violations
Badge Differentiation: Use distinct badge colors or markings for contract/temporary staff:
- Makes it immediately obvious who is a contractor
- Easier to enforce escort requirements
- Helps employees recognize when someone may need assistance
- Aids in after-hours monitoring
Access Restrictions: Limit contractor access to only what’s necessary:
- Time-based access that automatically expires
- Area-based access is restricted to work locations
- Prevent access to sensitive areas without an escort
- Regular audit of contractor access privileges
Supervision Requirements: Establish clear oversight for contract workers:
- Designate employee supervisors responsible for contractor security compliance
- Define escort requirements for different types of contractors
- Establish check-in/check-out procedures for after-hours work
- Require employee presence for work in sensitive areas
Vendor Management and Screening
Effective security for contract and temporary workers begins before they ever arrive at your facility. Implementing comprehensive vendor management and screening processes ensures that you only grant access to individuals who meet your security standards.
Why Vendor Screening Matters:
When you contract with a vendor, you’re trusting them to send qualified, trustworthy individuals into your facility – often into sensitive areas, after hours, or with minimal supervision. Without proper screening:
- You have no assurance of who will actually show up
- Criminal backgrounds may go undetected
- Individuals with conflicts of interest may gain access
- Your organization assumes liability for inadequately screened contractors
- You may inadvertently violate compliance requirements
Two-Tier Screening Approach:
Tier 1: Vendor Company Screening
Before establishing a relationship with any vendor company, evaluate their security practices:
Business Verification:
- Confirm business is properly licensed and insured
- Verify liability insurance coverage (including cyber liability if applicable)
- Check Better Business Bureau rating and complaint history
- Verify business longevity and financial stability
- Confirm they’re not on any exclusion or debarment lists
Security Program Assessment: Request documentation of the vendor’s security practices:
- Employee background screening procedures
- Drug testing policies (if applicable to your industry)
- Security awareness training programs
- Employee supervision and oversight procedures
- Incident reporting and investigation processes
- Data security and confidentiality practices
- Employee termination procedures
Compliance Documentation: Verify vendor compliance with relevant regulations:
- OSHA safety training (for maintenance/construction contractors)
- Industry-specific certifications (HVAC, electrical, IT, etc.)
- Data privacy compliance (if handling sensitive information)
- Immigration verification (I-9 compliance)
- Workers’ compensation coverage
References and Track Record:
- Check references from similar facilities
- Review any security incidents at other client sites
- Assess responsiveness to security concerns
- Evaluate the training and supervision of field personnel
Tier 2: Individual Contractor Screening
Even when working with reputable vendor companies, require screening of individual contractors who will access your facility:
Background Check Requirements:
Establish minimum screening standards based on access level:
Standard Access (General Areas, Escorted):
- Identity verification
- Criminal history check (7-year minimum)
- Sex offender registry check
- Terrorist watch list screening
Elevated Access (Sensitive Areas, Unescorted After Hours):
- Everything in standard access, plus:
- Extended criminal history (10+ years)
- Credit check (for positions with financial system access)
- Employment history verification
- Education/credential verification (if relevant)
- Reference checks
- Motor vehicle record check (if driving on property)
Critical Access (Data Centers, R&D, Executive Areas):
- Everything in elevated access, plus:
- More extensive criminal background (county, state, federal)
- Financial background review
- Social media screening (if legally permissible in your jurisdiction)
- Continuous monitoring during the contract period
Pre-Approval Process:
Implement a formal process for contractor approval:
- Vendor Submits Contractor Information:
- Full legal name and any aliases
- Date of birth
- Social Security Number (or work authorization number)
- Current address and address history
- Photo for badge creation
- Emergency contact information
- Specific areas where the contractor will work
- Expected duration of assignment
- Background Screening Conducted:
- Use a reputable screening provider
- Ensure compliance with Fair Credit Reporting Act (FCRA)
- Document screening level based on access required
- Establish acceptable timeframes (typically 7-10 business days)
- Results Review and Decision:
- Establish clear criteria for disqualifying results
- Document decision-making process
- Provide adverse action notices if required by law
- Allow the vendor to submit alternative contractors if needed
- Approval and Documentation:
- Issue formal approval for a specific time period
- Create an access profile in the badge system
- Document screening results and approval decision
- Set expiration date for approval and badge access
Contractual Requirements:
Your vendor contracts should explicitly address screening and security:
Screening Provisions: “Vendor shall conduct background screening of all personnel who will access Client facilities, consistent with Client’s screening requirements (attached as Exhibit A). The Vendor shall provide written certification that all screening has been completed and meets the Client’s requirements before personnel may access the facilities.
Vendor shall immediately notify Client if any employee fails to meet screening requirements or if adverse information is discovered after initial screening. Client reserves the right to deny access to any Vendor personnel based on screening results or security concerns.
Vendor shall maintain documentation of all background screenings for the duration of the contract plus [3] years and make such documentation available to Client upon request.”
Training Provisions: “Vendor shall ensure all personnel complete Client’s security awareness training before accessing facilities. Vendor shall provide documentation of training completion and maintain records of all required refresher training.
Vendor personnel who have not completed required training shall not be granted unescorted access to Client facilities under any circumstances.”
Compliance and Audit Provisions: “Client reserves the right to audit Vendor’s compliance with screening and training requirements at any time. Vendor shall cooperate fully with such audits and provide requested documentation within [5] business days.
Failure to maintain compliance with screening and training requirements shall be considered a material breach of contract and may result in immediate termination of access for non-compliant personnel or termination of the contract.”
Liability Provisions: “Vendor shall indemnify and hold harmless Client from any claims, damages, or losses resulting from Vendor’s failure to properly screen or supervise personnel, including but not limited to theft, data breaches, workplace violence, or other security incidents caused by Vendor personnel.”
Ongoing Monitoring:
Security screening isn’t a one-time event. Implement ongoing oversight:
Re-Screening Requirements:
- Annual re-screening for long-term contractors
- Immediate re-screening if concerning behavior is observed
- Continuous criminal monitoring services (if budget allows)
- Review when the contractor’s role or access level changes
Incident Reporting: Require vendors to report immediately:
- Arrests or criminal charges of personnel with facility access
- Terminations for cause
- Security policy violations
- Any behavior that raises concerns
- Changes in personnel assigned to your account
Access Audits:
- Quarterly review of all active contractor badges
- Verify individuals still require access
- Confirm screening remains current
- Remove access for contractors no longer working at the facility
Vendor Performance Reviews:
- Evaluate security compliance as part of vendor performance
- Track incidents involving vendor personnel
- Review training completion rates
- Assess responsiveness to security concerns
- Consider security performance in contract renewal decisions
Special Considerations:
Emergency or Rush Projects: When urgent needs require contractors before full screening is complete:
- Require constant escort by a cleared employee
- Limit access to only necessary areas
- Document the emergency circumstances
- Complete a full screening before granting unescorted access
- Consider this scenario in your risk assessment
Remote or Off-Site Contractors: For contractors who don’t physically access facilities but may access systems remotely:
- Apply similar screening standards
- Focus on data security and confidentiality
- Require documented cybersecurity training
- Implement technical controls (VPN, MFA, access restrictions)
- Monitor and log remote access activities
International Contractors: For contractors from other countries:
- Understand the limitations of international background screening
- Work with screening providers experienced in relevant countries
- Require additional documentation (passport, work visa, etc.)
- Consider enhanced supervision requirements
- Comply with immigration and employment laws
Multi-Facility Contractors: For vendors whose personnel work at multiple locations:
- Centralize the screening and approval process
- Share approved contractor lists across facilities
- Standardize badge appearance across locations
- Coordinate on incident information
- Maintain consistent standards despite local variations
Documentation Requirements:
Maintain comprehensive records of your vendor screening program:
Vendor Company Files:
- Business verification documents
- Insurance certificates
- Licenses and certifications
- Security program documentation
- Contract with security provisions
- Correspondence regarding security issues
- Performance evaluations, including security metrics
Individual Contractor Files:
- Screening results (secured to protect privacy)
- Approval/disapproval decisions with justification
- Training completion certificates
- Badge issuance records
- Access history logs
- Incident reports (if any)
- Re-screening results
Program Documentation:
- Screening policies and procedures
- Decision criteria for approval/denial
- FCRA compliance procedures
- Audit results
- Program effectiveness metrics
Legal and Compliance Considerations:
Ensure your vendor screening program complies with applicable laws:
Fair Credit Reporting Act (FCRA):
- Provide required disclosures before screening
- Obtain written authorization for background checks
- Follow adverse action procedures if denying based on screening
- Use a Consumer Reporting Agency compliant with FCRA
- Maintain required documentation
Equal Employment Opportunity (EEO) Laws:
- Apply screening criteria consistently
- Avoid criteria that have disparate impact
- Make individualized assessments of criminal history
- Document legitimate business reasons for screening requirements
- Consider EEOC guidance on arrest and conviction records
State and Local Laws:
- “Ban the box” laws limiting criminal history inquiries
- State-specific restrictions on background checks
- Local ordinances regarding screening
- Data privacy laws governing information collection
- Notification requirements before screening
Industry-Specific Regulations:
- Healthcare (HIPAA) requirements for contractor screening
- Financial services (FINRA, SEC) requirements
- Government contractor requirements (security clearances)
- Critical infrastructure protection requirements
- Data privacy regulations (GDPR, CCPA) if handling protected information
Implementation Checklist – Vendor Screening:
[ ] Develop vendor company screening requirements
[ ] Create individual contractor screening standards based on access levels
[ ] Select and contract with a background screening provider
[ ] Develop screening request and approval process
[ ] Create contract language addressing screening and security requirements
[ ] Establish documentation and record-keeping system
[ ] Train procurement and security staff on screening procedures
[ ] Implement vendor pre-approval process before badge issuance
[ ] Create a system for tracking screening expiration dates
[ ] Establish ongoing monitoring and re-screening protocols
[ ] Develop audit procedures for vendor compliance
[ ] Ensure legal compliance (FCRA, EEO, state/local laws)
[ ] Create incident reporting requirements for vendors
[ ] Establish vendor performance metrics, including security compliance
[ ] Document emergency access procedures when screening is incomplete
Training Documentation:
Maintain records showing:
- Which contractors/temporary staff received training
- Date and type of training completed
- Assessment scores (if applicable)
- Signed acknowledgments
- Expiration dates for refresher training
- Security incidents involving contractors
Language and Accessibility:
Ensure training is accessible to your actual workforce:
- Provide training materials in relevant languages
- Use visual aids and demonstrations
- Verify comprehension through questions or demonstrations
- Provide written reference materials
- Make training available in multiple formats (video, in-person, written)
Implementation Checklist:
[ ] Assess what percentage of your facility users are contract/temporary staff
[ ] Review current security training provided to non-employees
[ ] Develop a focused security orientation appropriate for the temporary workforce
[ ] Create materials in multiple languages as needed
[ ] Establish delivery method (video, in-person, written)
[ ] Update contracts to include security training requirements
[ ] Implement badge differentiation for contractors
[ ] Define access restrictions and escort requirements
[ ] Train employee supervisors on contractor oversight responsibilities
[ ] Create a documentation system for contractor security training
[ ] Establish a process for providing training before badge issuance
[ ] Schedule regular audits of contractor security compliance
5. Integration Testing Between Video Surveillance and Access Control
Why This Matters
Modern security systems are increasingly integrated – your access control system can trigger video recording, your video analytics can verify identities at access points, and both systems can feed data to a central management platform. This integration provides powerful capabilities, but only if it functions as intended.
Many organizations invest in integrated security systems but never verify that the integration functions properly under real-world conditions. The result: when you need the integration most – during an actual security incident – you discover it doesn’t work as expected.
What Typically Goes Wrong
The Installation Assumption: Organizations often assume that because an integrator has installed a system and demonstrated basic functionality, the integration will continue to work indefinitely without testing or maintenance.
Common Integration Problems:
System Communication Failures:
- Access control and video management systems lose communication after software updates
- Database synchronization issues cause mismatched user information
- Network configuration changes break integration without anyone noticing
- Firewall rules inadvertently block integration traffic
Functional Integration Issues:
- Access events that should trigger video recording don’t
- Video bookmarks created by access events don’t align with actual events
- Search functions that should correlate access data with video don’t work properly
- Alarms that should activate cameras fail to do so
- Event timelines combining multiple systems show incorrect sequences
Performance Problems:
- Integration causes database slowdowns
- Video retrieval times are excessive when accessing through the access control system
- System response times degrade under normal load
- Integration features work individually but fail when multiple events occur simultaneously
Configuration Drift:
- Systems are initially integrated, but later modifications break connections
- New doors added to access control, but not linked to cameras
- New cameras installed, but not associated with nearby access points
- User permissions allowing access to one system but not the integrated partner
Real-World Impact
During an assessment of a corporate campus, the security manager proudly demonstrated their integrated security system. Access card swipes were supposed to trigger video recording and create bookmarks for easy retrieval.
A test was conducted: a visitor badge was used to enter a restricted area (with permission). According to the system design, this should have:
- Logged the access event with my name and badge number
- Triggered video recording from the camera covering that door
- Created a video bookmark associated with the access event
- Generated an alert (visitor badge used in restricted area)
What actually happened:
- Access was logged correctly ✓
- No video recording was triggered ✗
- No bookmark was created ✗
- No alert was generated ✗
Further investigation revealed that a software update to the access control system three months earlier had broken the integration with the video management system. No one noticed because they never tested the integration; they only checked to see if each system functioned independently.
When I asked how they would investigate a security incident, the security manager explained they would look up the access event, note the time, then manually search the video for that timeframe. The integration, which cost tens of thousands of dollars to implement, wasn’t actually being used because it didn’t work.
In another case, a facility discovered during an actual incident investigation that their integration had mapped the wrong cameras to access points. When an access event triggered recording, it recorded from a camera 50 feet away rather than the camera actually covering the door. This error had existed for over a year, making dozens of investigations unnecessarily difficult.
How to Address It
Establish Comprehensive Integration Testing:
Integration testing should verify not only that systems can communicate effectively, but also that they deliver the intended operational value.
Initial Acceptance Testing:
When a new integrated system is installed or after major updates, conduct thorough testing:
Communication Verification:
- Confirm all systems can communicate on the network
- Verify database synchronization occurs properly
- Test backup and failover of integration services
- Confirm integration continues after system reboots
Functional Testing:
- Test each integrated function under actual operational conditions
- Verify that access events trigger the appropriate video recording
- Confirm video bookmarks align accurately with access events
- Test search functions across integrated systems
- Verify alarms trigger appropriate responses in connected systems
- Test user interface access to integrated functions
Performance Testing:
- Generate multiple simultaneous events to test system capacity
- Measure response times for integrated functions
- Verify integration doesn’t degrade individual system performance
- Test during peak usage periods
Scenario-Based Testing: Create realistic scenarios and verify integrated response:
- Forced door alarm: Does the video automatically display and record?
- After-hours access: Does the system generate appropriate alerts?
- Visitor badge in restricted area: Do all expected responses occur?
- Lost badge reported: Does access control immediately disable it?
- Multiple simultaneous alarms: Does integration handle without degradation?
Ongoing Testing Protocols:
Integration isn’t a one-time event – it requires regular validation:
Monthly Quick Tests:
- Verify basic communication between systems
- Test sample of integrated functions
- Review system logs for integration errors
- Confirm no recent changes broke integration
Quarterly Comprehensive Tests:
- Test all integrated functions systematically
- Verify bookmarks and event correlation accuracy
- Test reporting functions that span multiple systems
- Review and address any issues identified in monthly tests
- Update documentation of integration configuration
After Any System Changes: Immediately test integration after:
- Software or firmware updates
- Hardware replacements or additions
- Network configuration changes
- Security policy modifications
- Addition or removal of access points or cameras
- Database changes or migrations
- Changes to user permissions or system access
Documentation Requirements:
Maintain comprehensive documentation of:
- Integration architecture and configuration
- Which systems are integrated and how
- Expected behavior for each integrated function
- Testing procedures and schedules
- Test results with dates and findings
- Issues identified and resolution status
- Contact information for vendors and support
- Configuration backups and version control
Common Integration Points to Test:
Access Control → Video Management:
- Access events trigger recording
- Denied access attempts trigger alerts and recording
- Forced door alarms activate cameras
- Video bookmarks created at access events
- Access cardholder information displayed with video
- Search functions allow finding videos by access event
Video Analytics → Access Control:
- Facial recognition verifies identity at access points
- License plate recognition opens vehicle gates
- Tailgating detection generates access control alerts
- Loitering detection in secure areas creates access events
Access Control → Intrusion Detection:
- Arming/disarming is linked to access permissions
- After-hours access in armed areas generates alerts
- Access attempts during armed status were handled properly
- Integration of door contacts with intrusion zones
Integrated Monitoring Platform:
- All systems feed data to central monitoring
- Operators can control all systems from a single interface
- Event correlation across systems works properly
- Combined reporting functions accurately
- User permissions span all integrated systems appropriately
Vendor Accountability:
Include in vendor contracts:
- Integration testing requirements before acceptance
- Response time requirements for integration issues
- Regular testing as part of maintenance contracts
- Documentation of integration configuration
- Notification requirements before any changes that might affect integration
Training on Integration:
Ensure security staff understand:
- What integrated functions exist, and how they work
- How to verify integration is functioning
- What to do when integration fails
- How to temporarily work around integration issues
- Whom to contact for integration support
Implementation Checklist:
[ ] Document all integrated functions your systems are supposed to provide
[ ] Create testing procedures for each integrated function
[ ] Establish testing schedule (monthly quick tests, quarterly comprehensive)
[ ] Assign responsibility for conducting and documenting tests
[ ] Test communication between integrated systems
[ ] Test each functional integration with realistic scenarios
[ ] Document current integration status and any identified issues
[ ] Establish protocol for testing after any system changes
[ ] Create integration troubleshooting guide
[ ] Train all security personnel on integrated functions and testing
[ ] Review vendor contracts for integration support requirements
[ ] Establish response requirements when integration failures are identified
[ ] Create backup procedures for when integration is not available
[ ] Schedule regular review of integration effectiveness
Bringing It All Together: Creating Your Comprehensive Assessment Process
These five often-overlooked elements share a common theme: they’re all items that can be addressed with relatively modest investment, but they require consistent attention and organizational discipline.
Building a Complete Assessment Protocol
Integrate These Elements into Your Regular Assessment Process:
During Physical Walkthroughs:
- Observe visitor management during different times, including shift changes
- Check emergency lighting visibility and functionality
- Note locations where integration should be tested
- Identify areas where contract workers are present
During Operational Reviews:
- Review backup power testing logs
- Examine security training records for contract employees
- Verify integration testing documentation
- Analyze incident reports for patterns related to these gaps
During Interviews:
- Ask security officers about shift change procedures
- Question the maintenance staff about backup power testing
- Interview contract supervisors about security training
- Discuss integration reliability with security operators
Creating an Annual Security Assessment Checklist
Use this comprehensive checklist to ensure these often-overlooked elements receive proper attention:
Visitor Management:
[ ] Observe visitor processing during shift changes
[ ] Review visitor logs for patterns during transitions
[ ] Interview officers about shift change protocols
[ ] Test badge system during shift overlap
[ ] Review and update shift change procedures
Backup Power:
[ ] Test each access control panel’s battery backup
[ ] Verify UPS systems under load
[ ] Document expected vs. actual runtime
[ ] Check battery age and replacement schedule
[ ] Test during low-activity period with full load
Emergency Lighting:
[ ] Walk all evacuation routes with emergency lighting only
[ ] Test each emergency light’s battery backup
[ ] Check for obstructions or burned-out fixtures
[ ] Measure illumination levels in evacuation paths
[ ] Verify exit signs point to current evacuation routes
Contract/Temporary Staff Training:
[ ] Review records of security training for contractors
[ ] Interview contract workers about security knowledge
[ ] Audit badge issuance procedures for temp staff
[ ] Review contract language regarding security requirements
[ ] Update training materials as needed
System Integration:
[ ] Test access control to video integration
[ ] Verify alarm responses across systems
[ ] Test search and reporting functions
[ ] Review integration error logs
[ ] Conduct scenario-based integration tests
The ROI of Addressing These Gaps
Investing time and resources in these often-overlooked elements provides a significant return:
Risk Reduction: Closing each gap prevents a potential incident. The cost of addressing these issues is minimal compared to the cost of incidents they might prevent.
Operational Efficiency: Properly functioning integrated systems save time during investigations. Reliable backup power prevents operational disruptions. Well-trained contract staff reduces security incidents.
Compliance Benefits: Many of these elements relate to regulatory requirements (life safety, emergency systems, training documentation). Addressing them helps ensure compliance.
Liability Mitigation: Documented testing and training demonstrate due diligence in security operations, which can be valuable in the event of liability issues arising.
Staff Confidence: Security personnel work more effectively when they know systems will function as expected and everyone (including contractors) understands security requirements.
Conclusion: Moving from Awareness to Action
Identifying these often-overlooked elements is only the first step. The real value comes from systematically addressing them and incorporating their ongoing maintenance into your security operations.
Your Action Plan:
Week 1: Assessment
- Evaluate your current status for each of these five elements
- Document gaps and vulnerabilities
- Prioritize based on risk and ease of correction
Week 2-4: Quick Wins
- Address immediate safety issues (failed emergency lighting, etc.)
- Implement testing procedures that don’t require major investment
- Update documentation and procedures
Month 2-3: Systematic Improvements
- Develop training programs
- Establish testing schedules
- Create documentation systems
- Assign responsibilities
Ongoing: Sustainable Operations
- Integrate these elements into regular security operations
- Document testing and training
- Continuously improve based on findings
- Review and update procedures annually
Need Help Conducting a Comprehensive Security Assessment?
These five elements are essential, but they’re part of a much larger security picture. A professional security assessment examines every aspect of your facility’s security posture, from obvious elements like access control and video surveillance to often-overlooked gaps.
At Gordon Security Solutions, we bring a unique perspective to security assessments. As both a security management professional and an active pilot, I understand security from multiple viewpoints – the operational challenges facilities face, the regulatory requirements they must meet, and the practical realities of implementing security measures that enhance rather than impede operations.
Our comprehensive security assessments include:
- Physical security evaluation
- Access control and visitor management review
- Technology assessment and integration testing
- Emergency preparedness evaluation
- Policy and procedure review
- Regulatory compliance verification
- Risk analysis and prioritized recommendations
- Implementation roadmap with budget estimates
Don’t let these often-overlooked gaps create vulnerabilities in your security program.
Schedule a Complimentary 30-Minute Consultation
Let’s discuss your facility’s security needs and how we can help you identify and address both obvious and overlooked vulnerabilities.
Contact Us:
Phone: 610-621-2816
Email: scott@gordonsecuritysolutions.com
About Gordon Security Solutions
Gordon Security Solutions is a comprehensive enterprise security risk management platform provider that empowers organizations to transform security from a cost center into a strategic business advantage.
Through an integrated suite of modules—including Risk Assessments, Incident Reports, Business Continuity, Task Management, Crisis Management, and Business Impact Analysis—Gordon Security Solutions helps security leaders demonstrate measurable value while protecting their organization’s most critical assets. The platform we provide eliminates manual processes, delivers real-time visibility, and provides the data-driven insights needed to make security decisions that align with business objectives.
Ready to elevate your security program? Connect with our team to discover how we’re helping organizations reduce operational costs, ensure compliance, and build security programs that drive business success.